Have you ever wanted to make your own candles but felt overwhelmed by complex instructions or the pressure to buy expensive courses? Here is my candle making recipe from my first try. That’s exactly where I found myself a few weeks ago. After diving into countless videos and blog posts, I realized something frustrating – hardly anyone shares a simple, straightforward recipe for beginners! Everyone seems to want you to purchase their course instead.
Well, I decided to jump in headfirst without a recipe, and guess what? It worked beautifully! Today, I’m sharing my exact process so you can skip the confusion and get straight to creating gorgeous homemade candles.
Why I Love Making My Own Candles
There’s something incredibly satisfying about lighting a candle you’ve made with your own hands. The warm glow, the perfect scent you selected yourself, and the pride of creating something beautiful from scratch – it’s truly a rewarding experience.
Plus, once you have the basic supplies, you can make multiple candles for a fraction of what you’d pay for premium store-bought versions!
Visit our Pinterest for more pictures or TikTok
Essential Supplies for Your First Candle Making
Before we dive into the recipe, here’s everything you’ll need:
- Paraffin wax (or any candle wax of your choice)
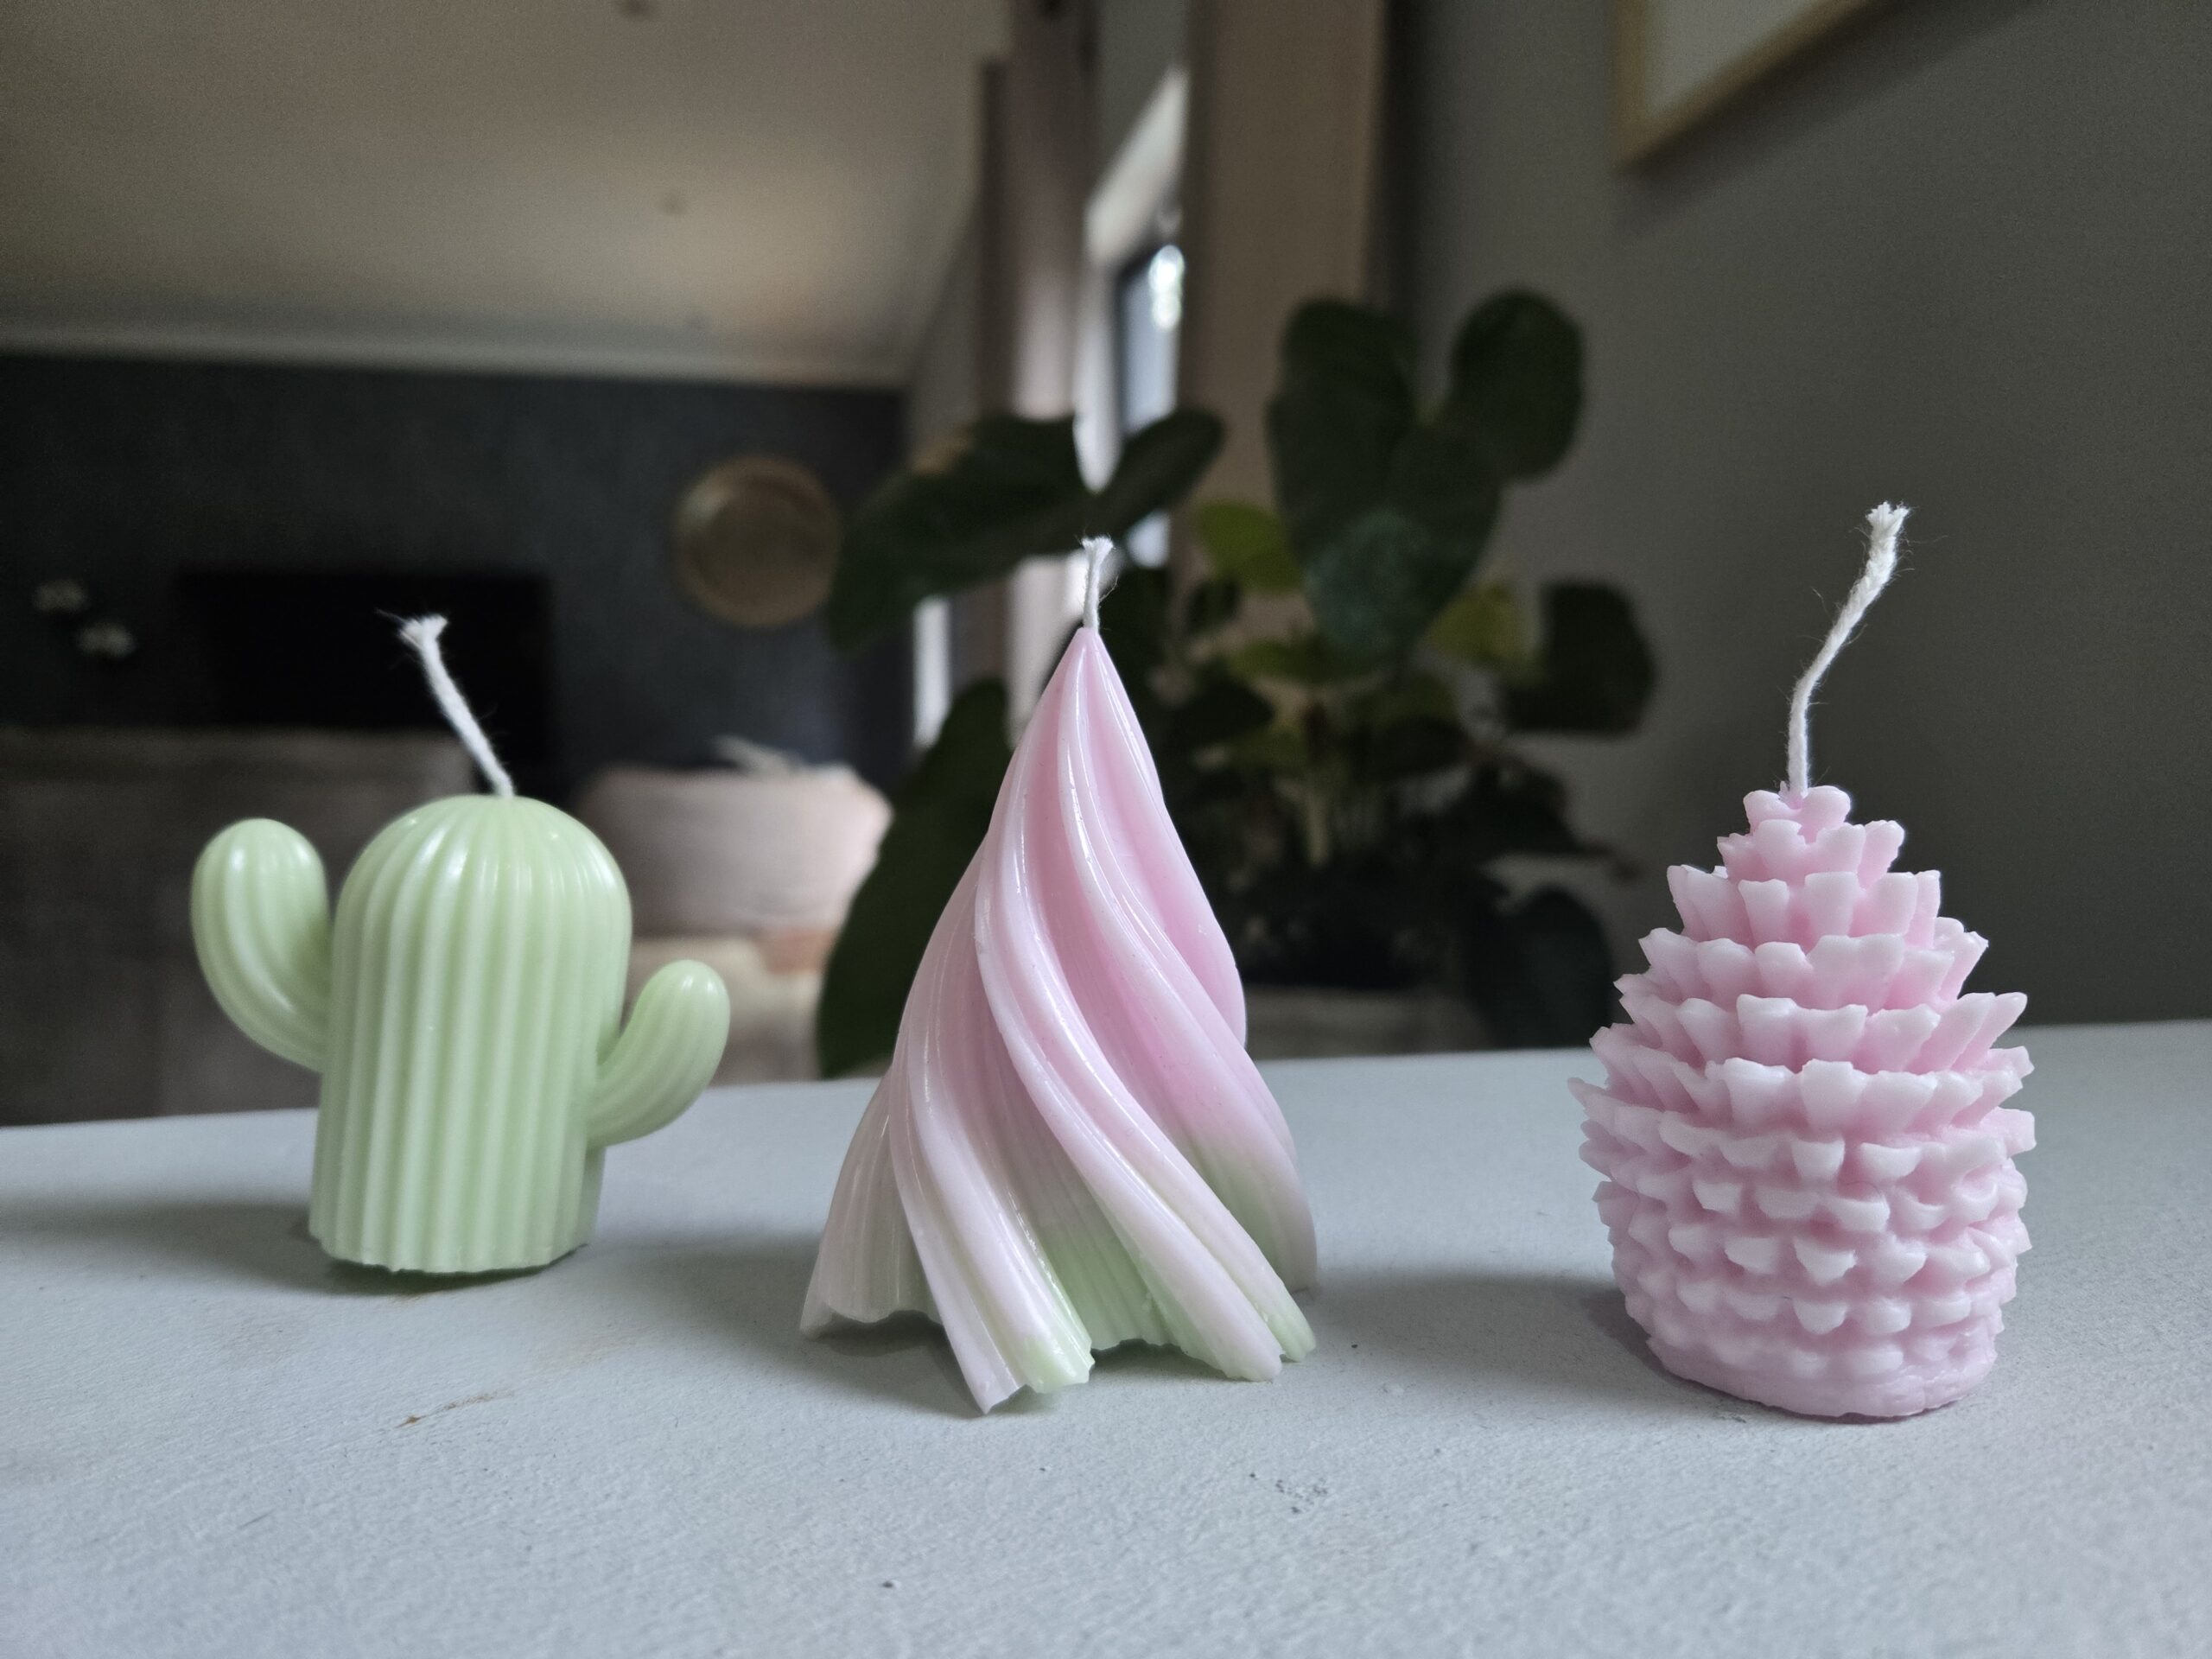
- Silicone mold (I used a pretty trolley pear shape)
- Wicks with sustainers
- Fragrance oil of your choice
- Dye blocks for color
- Measuring cup
- Kitchen scale
- Steel cup or small pot for melting
- Larger pot for water bath
- Long metal spoon dedicated to candle making
- Thermometer (helpful but not absolutely necessary)
- Newspaper to protect your workspace
- Needle or toothpick for wick placement
- Wick holder (can be as simple as a pencil with the wick wrapped around it)
My First-Timer Candle Recipe
Step 1: Determine How Much Wax You Need
This clever hack saved me from wasting materials! To figure out exactly how much wax I needed:
- I filled my silicone mold with water
- Carefully poured that water into a measuring cup
- Noted that it held 100ml of water
- Did a quick Google search to convert volume to weight for paraffin wax
- Measured out 90g of paraffin wax (slightly less than the water volume since wax expands when melted)
This simple trick works for any mold shape or size!
Step 2: Prepare Your Workspace
Before turning on any heat:
- I laid newspaper all over my counter (absolute lifesaver for cleanup!)
- Gathered all my supplies within reach
- Pre-warmed my silicone mold in the microwave for about 30 seconds
- Had my wick and wick holder ready
Pro Tip: Once your wax starts melting, things move quickly. Having everything prepared ahead of time prevents last-minute scrambling.

Step 3: Create Your Double Boiler
- I filled a pot with a few inches of water
- Placed it on a gas burner on medium-low heat
- Put my steel cup containing the measured wax into the water bath
- Waited patiently, stirring occasionally
Safety Note: Never melt wax directly over heat or in a microwave! Always use a double boiler setup to prevent fire hazards.
Step 4: Prepare the Wick While Wax Melts
This is something no one talks about enough – getting the wick properly positioned can be tricky! Here’s my solution:
- I poked a small hole in the bottom of my mold using a thermometer stick
- Used a needle to guide the wick through (a toothpick works well too!)
- Pulled the wick through until the sustainer was snugly against the mold bottom
- Secured the top of the wick with my makeshift wick holder
Game-Changing Tip: Using a needle to guide your wick through the mold is SO much easier than trying to position it after pouring hot wax!
Step 5: Add Color and Fragrance
Once my wax reached approximately 80°C (176°F):
- I added a tiny piece of dye block and stirred until completely melted
- Turned off the heat (but kept the cup in the warm water bath)
- Added about 10 drops of fragrance oil
- Stirred continuously for 2 full minutes
Important: That 2-minute stirring isn’t just busy work! It ensures the oil and wax properly fuse together, which affects how well your candle will distribute scent when burned.
Step 6: Pour the Wax
When the temperature dropped to around 75°C (167°F):
- I carefully removed the cup from the water bath (using an oven mitt)
- Slowly poured the wax into my prepared mold
- Made minor adjustments to center the wick if needed
- Left it undisturbed to set
Clever Hack: Keeping the water bath hot allowed me to place my wax cup back in between pours, keeping the remaining wax liquid for my second mold!

Step 7: The Waiting Game
This was the hardest part for me – being patient! I let my candle sit undisturbed overnight to fully set and cure.
Step 8: Removing from the Mold
Here’s where I learned an important lesson the hard way:
- I gently pulled the silicone away from the edges of the candle
- Stretched the mold bit by bit, working my way around
- Took my time – slow and gentle pressure works much better than rushing!

Complete Beginner’s Candle Making Recipe Card
Equipment
- Silicone mold
- Steel cup or small pot
- Larger pot for water bath
- Kitchen scale
- Long metal spoon
- Needle or toothpick
- Wick holder
- Thermometer
- Newspaper for protecting surfaces
Materials
- 90 g paraffin wax adjust based on your mold size
- Small piece of candle dye block
- 10 drops fragrance oil
- 1 pre-tabbed wick appropriate size for your mold
Instructions
- Determine wax amount: Fill mold with water, pour into measuring cup, convert to wax weight (approximately 10% less than water volume).
- Prepare workspace: Lay down newspaper, warm mold in microwave for 30 seconds.
- Set up double boiler: Fill pot with water, heat on medium-low, place wax in steel cup inside water bath.
- Prepare wick: Create small hole in mold bottom, use needle to guide wick through, secure with wick holder.
- Melt wax to approximately 80°C (176°F).
- Add color: Drop in small piece of dye block, stir until fully melted.
- Add fragrance: Turn off heat while keeping cup in water bath, add fragrance oil, stir for 2 full minutes.
- Pour at approximately 75°C (167°F) into prepared mold.
- Let set undisturbed overnight (minimum 8 hours).
- Remove carefully by gently stretching silicone mold bit by bit.
Notes
Troubleshooting Tips from My Experience
- If your candle has a sinkhole in the center: Your pouring temperature might have been too high. Try pouring at a slightly lower temperature next time.
- If your wick is off-center: Use the needle trick I mentioned before pouring, not after.
- If your color isn’t evenly distributed: You might need to stir more thoroughly while the dye is melting.
- If you spill wax: Let it harden completely, then it easily peels off most surfaces (hence the newspaper – makes cleanup a breeze!)
Essential Candle Making Tools No One Tells You About
From my experience, these are the unsung heroes of candle making that rarely get mentioned:- A dedicated “candle spoon”: I’ve permanently designated a long metal spoon from our kitchen for candle making.
- Newspaper: Absolute lifesaver for cleanup!
- A needle or toothpick: Game-changer for wick placement.
- Measuring cup with milliliter markings: Perfect for the water displacement method.
Why This Recipe Works for Beginners in Candle Making
What makes this approach perfect for first-timers is its simplicity and adaptability. By using the water displacement method, you’ll always know exactly how much wax you need, regardless of your mold shape or size. And by following these temperature guidelines, you’ll avoid many common beginner mistakes.
The best part? You can make your very first candle in under 30 minutes of active time (plus setting overnight), with beautiful results that will make you proud!
I hope this step-by-step guide helps you create beautiful candles without the frustration I initially experienced! Remember, candle making should be enjoyable, not stressful. Start simple, be patient with yourself, and soon you’ll be creating gorgeous custom candles that friends and family will marvel at!
Have you tried making candles at home? What was your experience like? Share in the comments below – I’d love to hear about your candle making adventures!
Read more about our candle experience My Journey into Candle Making
How do I know how much wax to use for different sized molds?
The water displacement method I described works for any mold! Fill your mold with water, pour into a measuring cup to determine volume in milliliters, then use approximately 10% less weight in grams of wax. This accounts for wax expansion when melted.
Why is my candle sinking in the middle as it cools?
This is common with paraffin wax, which contracts as it cools. To minimize this, try warming your mold first, pouring at a slightly lower temperature, or doing a second “top-up” pour once the first layer has partially set but still has a wet-looking surface.
How do I know what size wick to use?
As a general rule, the diameter of your candle determines wick size. For beginners using paraffin wax in molds under 3 inches in diameter, a medium cotton wick usually works well. For larger candles, you might need a thicker wick or multiple wicks.
Can I use essential oils instead of fragrance oils?
While possible, essential oils don’t always perform well in candles. They have lower flash points and can evaporate during the pouring process, resulting in weak scent throw. If you want to use essential oils, look specifically for ones rated for candle making, and you may need to use more than you would with fragrance oils.
How do I prevent air bubbles in my candles?
Pre-warming your mold helps tremendously. Additionally, pour your wax slowly and at the correct temperature. If you see bubbles forming, gently tap the sides of your mold or use a toothpick to pop visible surface bubbles before the wax sets.
Is it normal for my first candles to not look perfect?
Absolutely! Candle making is an art that improves with practice. My first attempts weren’t perfect either, but each batch gets better as you learn more about temperatures, pouring techniques, and how different waxes behave.
How long should I let my candle cure before burning it?
For paraffin wax candles, allow at least 24-48 hours of curing time for best results. This gives the wax time to fully set and the fragrance to properly bind with the wax. Patience results in better scent throw and burn performance!
Can I reuse my silicone molds immediately?
Yes! That’s one of the benefits of silicone molds. Once your candle is removed, simply rinse the mold with warm water to remove any wax residue, dry thoroughly, and it’s ready for your next creation.
What’s the best way to clean up wax spills?
Let any spilled wax harden completely, then gently lift it off the surface. For fabrics or porous surfaces, place a paper towel over the hardened wax and iron on low heat – the paper towel will absorb the melted wax.
How do I prevent my wick from moving when I pour the wax?
My needle method helps tremendously, but you can also use a bit of hot glue to secure the wick sustainer to the bottom of your mold before pouring. Just make sure the glue is completely cool before adding hot wax!