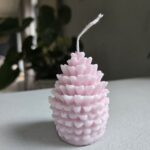
Complete Beginner's Candle Making Recipe Card
Create your very first homemade candle with this foolproof recipe that requires no special equipment or previous experience. Perfect for complete beginners, this simple method uses everyday kitchen items and basic candle supplies to create beautiful, scented candles in custom shapes. Learn the water displacement trick to measure wax perfectly for any mold, discover the secret to proper wick placement, and enjoy the satisfaction of crafting a professional-looking candle on your very first try!
Yield: 1 Candle
Equipment
- Silicone mold
- Steel cup or small pot
- Larger pot for water bath
- Kitchen scale
- Long metal spoon
- Needle or toothpick
- Wick holder
- Thermometer
- Newspaper for protecting surfaces
Materials
- 90 g paraffin wax adjust based on your mold size
- Small piece of candle dye block
- 10 drops fragrance oil
- 1 pre-tabbed wick appropriate size for your mold
Instructions
- Determine wax amount: Fill mold with water, pour into measuring cup, convert to wax weight (approximately 10% less than water volume).
- Prepare workspace: Lay down newspaper, warm mold in microwave for 30 seconds.
- Set up double boiler: Fill pot with water, heat on medium-low, place wax in steel cup inside water bath.
- Prepare wick: Create small hole in mold bottom, use needle to guide wick through, secure with wick holder.
- Melt wax to approximately 80°C (176°F).
- Add color: Drop in small piece of dye block, stir until fully melted.
- Add fragrance: Turn off heat while keeping cup in water bath, add fragrance oil, stir for 2 full minutes.
- Pour at approximately 75°C (167°F) into prepared mold.
- Let set undisturbed overnight (minimum 8 hours).
- Remove carefully by gently stretching silicone mold bit by bit.
Notes
Troubleshooting Tips from My Experience
- If your candle has a sinkhole in the center: Your pouring temperature might have been too high. Try pouring at a slightly lower temperature next time.
- If your wick is off-center: Use the needle trick I mentioned before pouring, not after.
- If your color isn't evenly distributed: You might need to stir more thoroughly while the dye is melting.
- If you spill wax: Let it harden completely, then it easily peels off most surfaces (hence the newspaper - makes cleanup a breeze!)
Essential Candle Making Tools No One Tells You About
From my experience, these are the unsung heroes of candle making that rarely get mentioned:- A dedicated "candle spoon": I've permanently designated a long metal spoon from our kitchen for candle making.
- Newspaper: Absolute lifesaver for cleanup!
- A needle or toothpick: Game-changer for wick placement.
- Measuring cup with milliliter markings: Perfect for the water displacement method.
