Have you ever considered revamping your home decor with fun DIY projects as the leaves begin to change and the air turns crisp? Autumn provides the perfect backdrop for some cozy, creative time at home. These crafts are not only budget-friendly but also easy to execute, making them ideal for a fun family activity. With that in mind, I’m excited to share the “Top 4 Fall DIY Craft Ideas to Transform Your Autumn Decor.” Let’s get started!

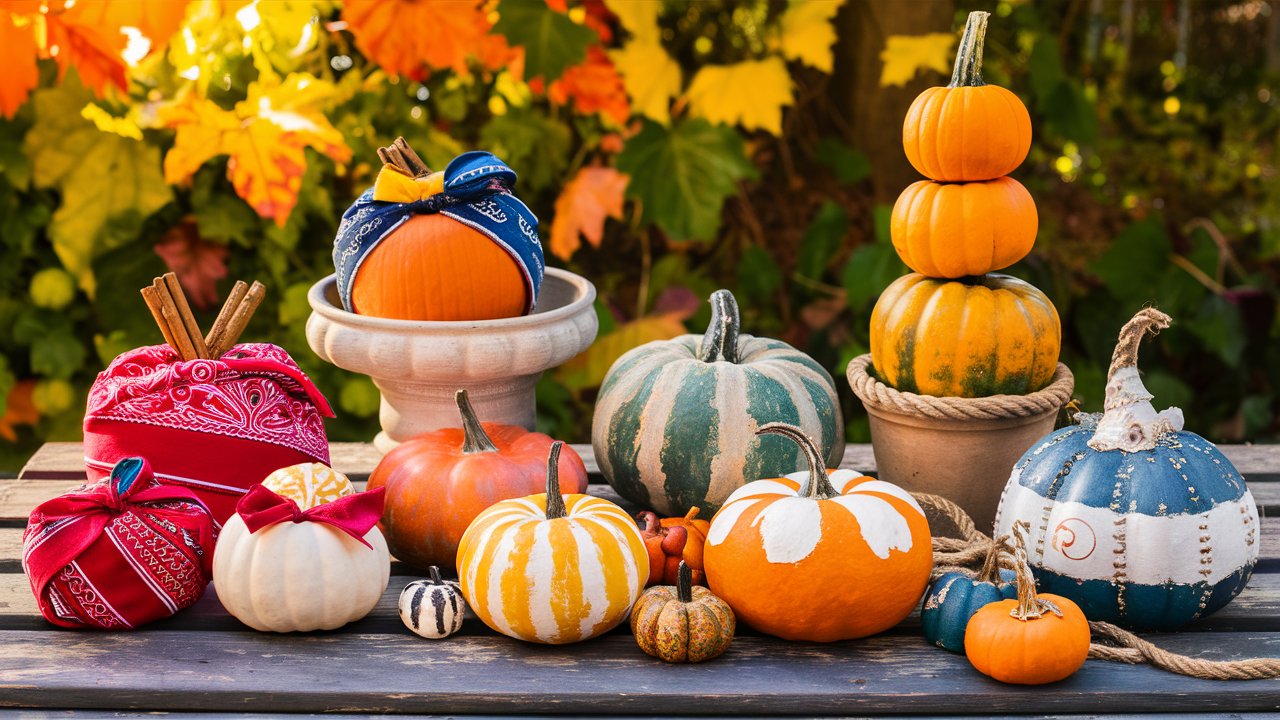
Bandana Pumpkin in 15 Minutes
Nothing screams fall more than pumpkins, and Creatively Bandana Pumpkins are a quick and budget-friendly way to spruce up your seasonal decor. Let me walk you through it.
Supplies
Here’s what you’ll need to create these charming pumpkins:
- Foam pumpkins
- Orange bandanas
- Natural twine
- Americana acrylic paint (Lamp Black)
- Paintbrush
- Scissors
- Craft knife
- Ruler
- Chopstick or pencil
- Glue gun and glue sticks
Process
- Gather and Prepare Supplies: First, grab all your materials. Cut a hole around the stems of each foam pumpkin using your craft knife. This will be where you tuck in your bandanas.
- Insert Bandanas: Fold and tuck the bandana fabric into the hole you just cut. Use a chopstick or pencil to push the fabric securely.
- Paint and Reattach Stems: Paint the stems with the Americana acrylic paint in Lamp Black for a rustic touch. Once dry, glue the stems back onto the pumpkins.
- Add Finishing Touches: Tie jute twine into bows and glue them onto the pumpkin stem for an extra bit of flair.
This easy craft can be customized—switch up the bandana colors to coordinate with your home decor for a personalized touch.
Encourage your kids or friends to join you in making these, and don’t forget to share your beautiful creations on social media.
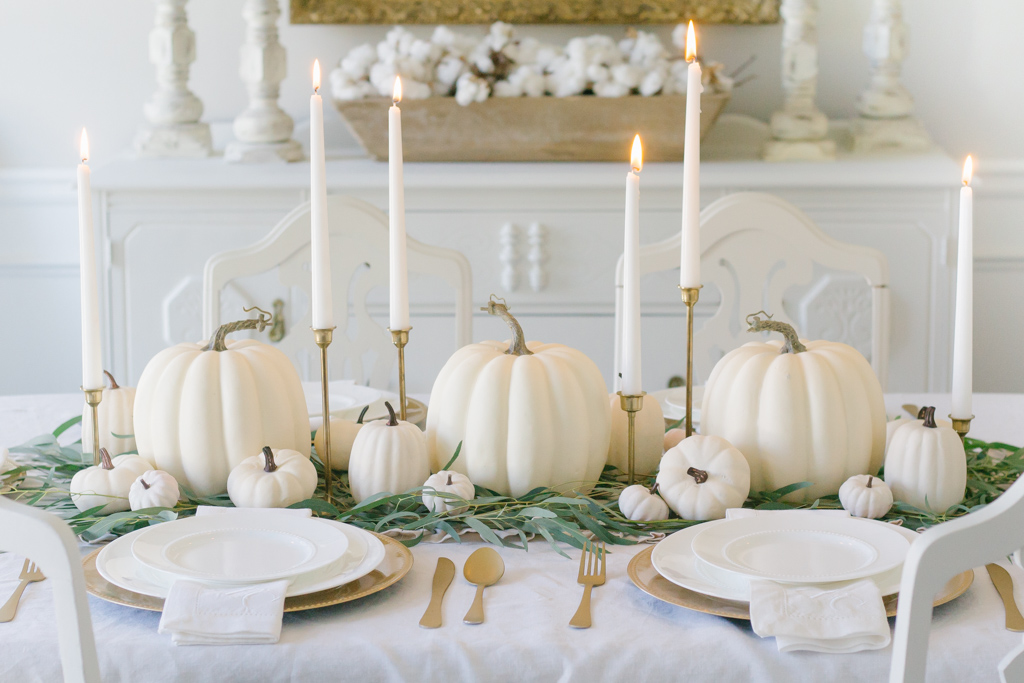
Chalk Painted Pumpkins
Supplies Needed
- Foam or real pumpkins
- Chalk paint in various colors
- Paintbrushes
- Stencils (optional)
Steps
- Choose and Prep Pumpkins: Start with selecting your pumpkins. If you’re using real ones, make sure they’re clean and dry.
- Paint Pumpkins: Apply a coat of chalk paint in your desired colors. The good thing about chalk paint is its fast-drying nature and matte finish. For an added texture, you can opt for a second coat or use stencils to add patterns.
- Dry and Display: Allow the paint to dry completely. Once done, these chic chalk-painted pumpkins can be displayed on your mantel, dining table, or even your porch.
Change the colors to match your home decor or stick to traditional autumn shades like burnt orange, deep reds, and glossy greens. They’re simple yet elegant and give a sophisticated touch to your seasonal decor.
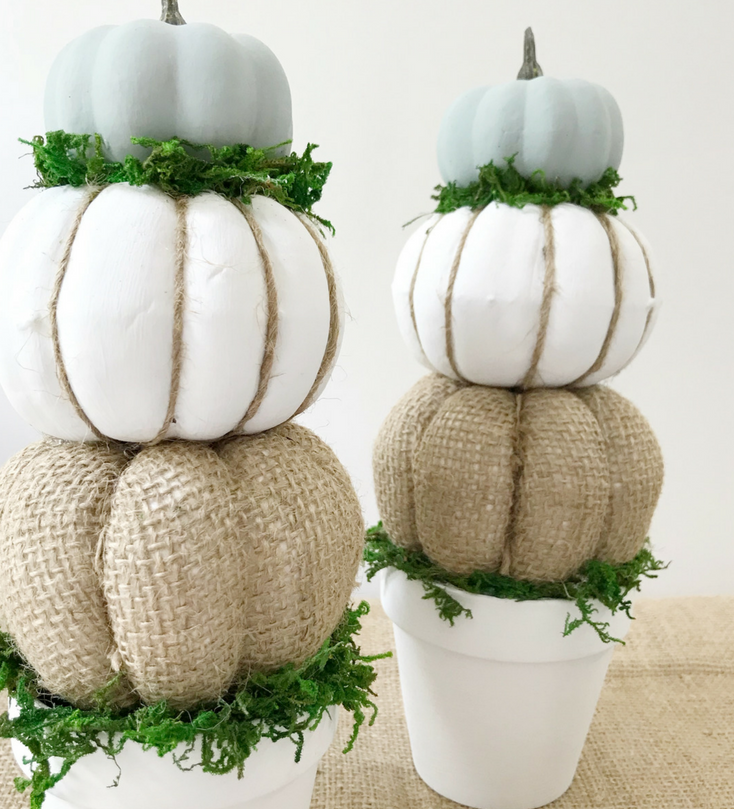
Farmhouse Pumpkin Topiaries
Farmhouse-style decor is all the rage these days, and it’s incredibly simple to incorporate into your fall theme with pumpkin topiaries.
Supplies Needed
- Three pumpkins of varying sizes
- Hot glue gun and glue sticks
- Paint or decorative materials
- Decorative base like a wooden crate or pedestal
Steps
- Select and Prep Your Pumpkins: Pick three pumpkins in different sizes. You can paint them in rustic hues or add decorative elements like burlap or twine.
- Stack and Secure: Stack the pumpkins on top of each other from largest to smallest, securing them with hot glue. Make sure each layer is stable.
- Decorate Base: Place the topiary on a decorative base. A wooden crate or pedestal works wonderfully for this aesthetic.
These topiaries add a farmhouse charm to any corner of your home. Plus, they’re a terrific way to reuse any old pumpkins you may have from previous years.
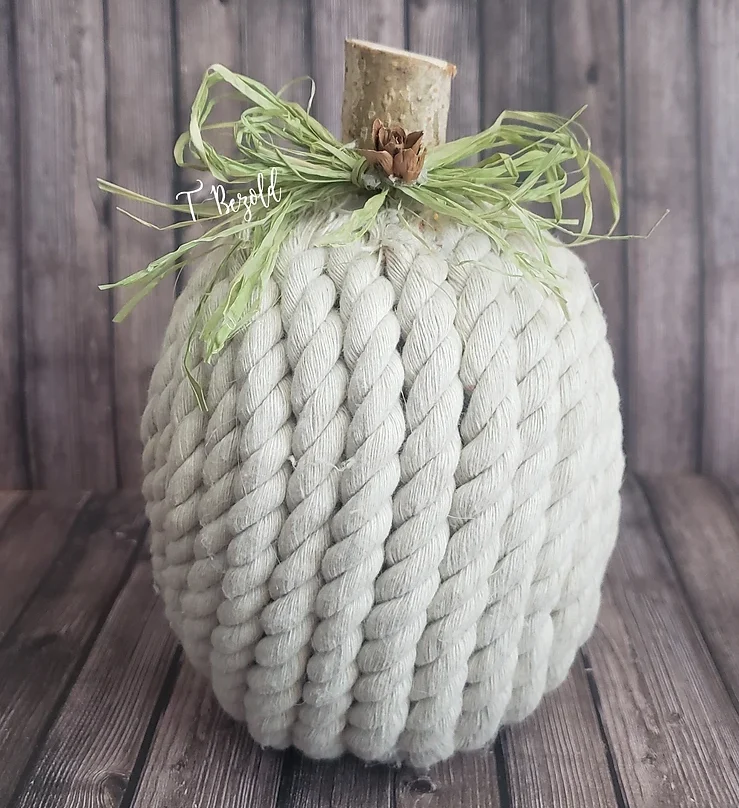
Pumpkin Nautical Makeover
If you love coastal themes and want to extend that style into autumn, this nautical makeover is just the craft for you.
Supplies Needed
- Plain pumpkins
- Paint in nautical colors (navy blue, white)
- Nautical-themed embellishments (rope, seashells)
- Hot glue gun and glue sticks
Steps
- Paint the Pumpkins: Select your plain pumpkins and paint them with nautical colors like navy blue or white. Let them dry completely.
- Add Embellishments: Once dry, use hot glue to attach nautical-themed embellishments. Think along the lines of rope wrapped around the stem or seashells glued around the base.
- Display with Pride: These nautical pumpkins can be a unique addition to your fall decor, particularly if you have a coastal-themed home.
This seaside touch can blend beautifully with your autumn decor while also standing out as a unique conversation piece.
Table of Supplies for Fall DIY Craft
Here’s a quick table summarizing the supplies needed for all four DIY projects:
| Craft Project | Supplies Needed |
|---|---|
| Bandana Pumpkins | Foam pumpkins, orange bandanas, natural twine, Americana acrylic paint (Lamp Black), paintbrush, scissors, craft knife, ruler, chopstick or pencil, glue gun and glue sticks |
| Chalk Painted Pumpkins | Foam or real pumpkins, chalk paint, paintbrush, stencils (optional) |
| Farmhouse Pumpkin Topiaries | Three pumpkins of varying sizes, hot glue gun and glue sticks, paint or decorative materials, decorative base like a wooden crate or pedestal |
| Pumpkin Nautical Makeover | Plain pumpkins, paint in nautical colors, nautical-themed embellishments, hot glue gun and glue sticks |
Top 5 Essential DIY Tools for Fall Crafts: Find Them on Amazon
Here are the top 5 pieces of equipment you’ll need for these DIY fall crafts, which you can find on Amazon:
- Hot Glue Gun
- Description: Essential for securely attaching decorations to pumpkins and other surfaces. Look for a high-temperature glue gun for strong adhesion.
- Example: Surebonder High-Temperature Glue Gun
- Chalk Paint Set
- Description: Ideal for creating a chic, matte finish on pumpkins. Choose a set with a variety of autumn colors.
- Example: FolkArt Chalk Paint Set
- Foam Pumpkins
- Description: Perfect for crafting with bandanas, chalk paint, and more. These pumpkins are easy to work with and can be customized.
- Example: Foam Pumpkin Decorations Set
- Craft Knife
- Description: Useful for cutting precise holes or shaping foam pumpkins. A sharp craft knife ensures clean cuts.
- Example: X-Acto Precision Knife Set
- Paintbrush Set
- Description: Needed for applying chalk paint and other finishes to your pumpkins. A variety of brush sizes will help with detailed work.
- Example: Artify 15-Piece Paintbrush Set
These items will help you execute your DIY fall projects with ease and achieve professional-looking results.
Bonus Tips and Final Thoughts For Fall DIY Craft
No matter which craft you decide to take on, making time for activities like these provides a break from our usual routines and adds a sense of warmth and personality to your home decor. Plus, involving the family or friends can make the experience even more special.
Customization Tips
- Personal Touch: Don’t hesitate to add your personal flair to these projects. For example, using family heirlooms as part of your decorations can add sentimental value.
- Multi-Use Items: Look around your home for items that can be repurposed. Old buttons, fabric scraps, and even outdated jewelry can bring a unique twist to your creations.
- Seasonal Adaptations: While these are autumn-themed, slight modifications can make these crafts suitable for other seasons. Imagine pastel chalk-painted pumpkins for spring or metallic painted pumpkins for a wintery feel.
Sharing Creations
Post your masterpieces on social media to inspire others. Use appropriate hashtags like #FallDIY, #PumpkinCrafts, or #AutumnDecor to connect with a broader community. With more and more people getting into DIY crafts, online platforms are wonderful spaces for sharing and getting inspiration.
Collaborations and More Ideas
If you’re keen to explore more projects, many bloggers and DIY enthusiasts offer a wealth of seasonal craft ideas. Sometimes a small tweak or collaboration can spark exceptionally creative outcomes you hadn’t initially considered.
So, roll up those sleeves, gather your materials, and let’s welcome fall with these delightful DIY projects. Happy crafting!
Here is DIY Bath Bombs for Kids and Adults
FAQ For Fall DIY Craft
How do I create chalk-painted pumpkins?
To create chalk-painted pumpkins, gather foam or real pumpkins, chalk paint in various colors, paintbrushes, and optional stencils. Start by selecting and prepping your pumpkins, then apply a coat of chalk paint. For added texture, use a second coat or stencils for patterns. Allow the paint to dry completely before displaying your chic pumpkins.
What are the steps to make Farmhouse Pumpkin Topiaries?
To make Farmhouse Pumpkin Topiaries, you’ll need three pumpkins of varying sizes, a hot glue gun with glue sticks, paint or decorative materials, and a decorative base like a wooden crate or pedestal. Stack the pumpkins from largest to smallest, securing each layer with hot glue. Decorate the base to complete the farmhouse look.
How can I give my pumpkins a nautical makeover?
For a nautical pumpkin makeover, you’ll need plain pumpkins, paint in nautical colors (like navy blue and white), and nautical-themed embellishments such as rope and seashells. Paint your pumpkins in the chosen colors, let them dry, then glue on the nautical embellishments to create a coastal-inspired fall decoration.
Where can I find supplies for these DIY projects?
Most supplies for these DIY fall crafts can be found at local craft stores, but you can also find many items on Amazon. Look for foam pumpkins, bandanas, chalk paint, and nautical-themed decorations to easily gather everything you need for these fun and affordable projects.
Can these crafts be customized for different seasons?
Yes, these crafts are versatile and can be adapted for different seasons. For example, use pastel colors for spring or metallic paints for winter. Adding personal touches or seasonal adaptations can keep your DIY projects fresh and engaging year-round.
What’s the best way to secure decorations on foam pumpkins?
When securing decorations on foam pumpkins, a hot glue gun is your best friend. Apply a small amount of glue to the back of your decorations and press them firmly onto the foam surface. For heavier items or those with uneven surfaces, you might need to hold them in place for a few seconds until the glue sets. If you’re working with intricate designs or small details, consider using a low-temperature glue gun to prevent melting the foam.
How can I ensure a smooth painting finish on my pumpkins?
To achieve a smooth painting finish on your pumpkins, make sure they are clean and dry before you start. For real pumpkins, gently wipe them with a damp cloth to remove any dirt or residue. If you’re using foam pumpkins, lightly sand the surface to help the paint adhere better. Apply a primer coat if needed, and use a high-quality paintbrush for an even application. Allow each coat to dry completely before applying another.