Are you looking for a creative hobby that’s both relaxing and rewarding? Let me share my recent adventure into the world of candle making! What started as a curious experiment has quickly become one of my favorite ways to unwind and express my creativity. In this post, I’ll walk you through my beginner’s experience, share some helpful tips, and hopefully inspire you to try this wonderful craft yourself.
Getting Started with Candle Making: My First Experience
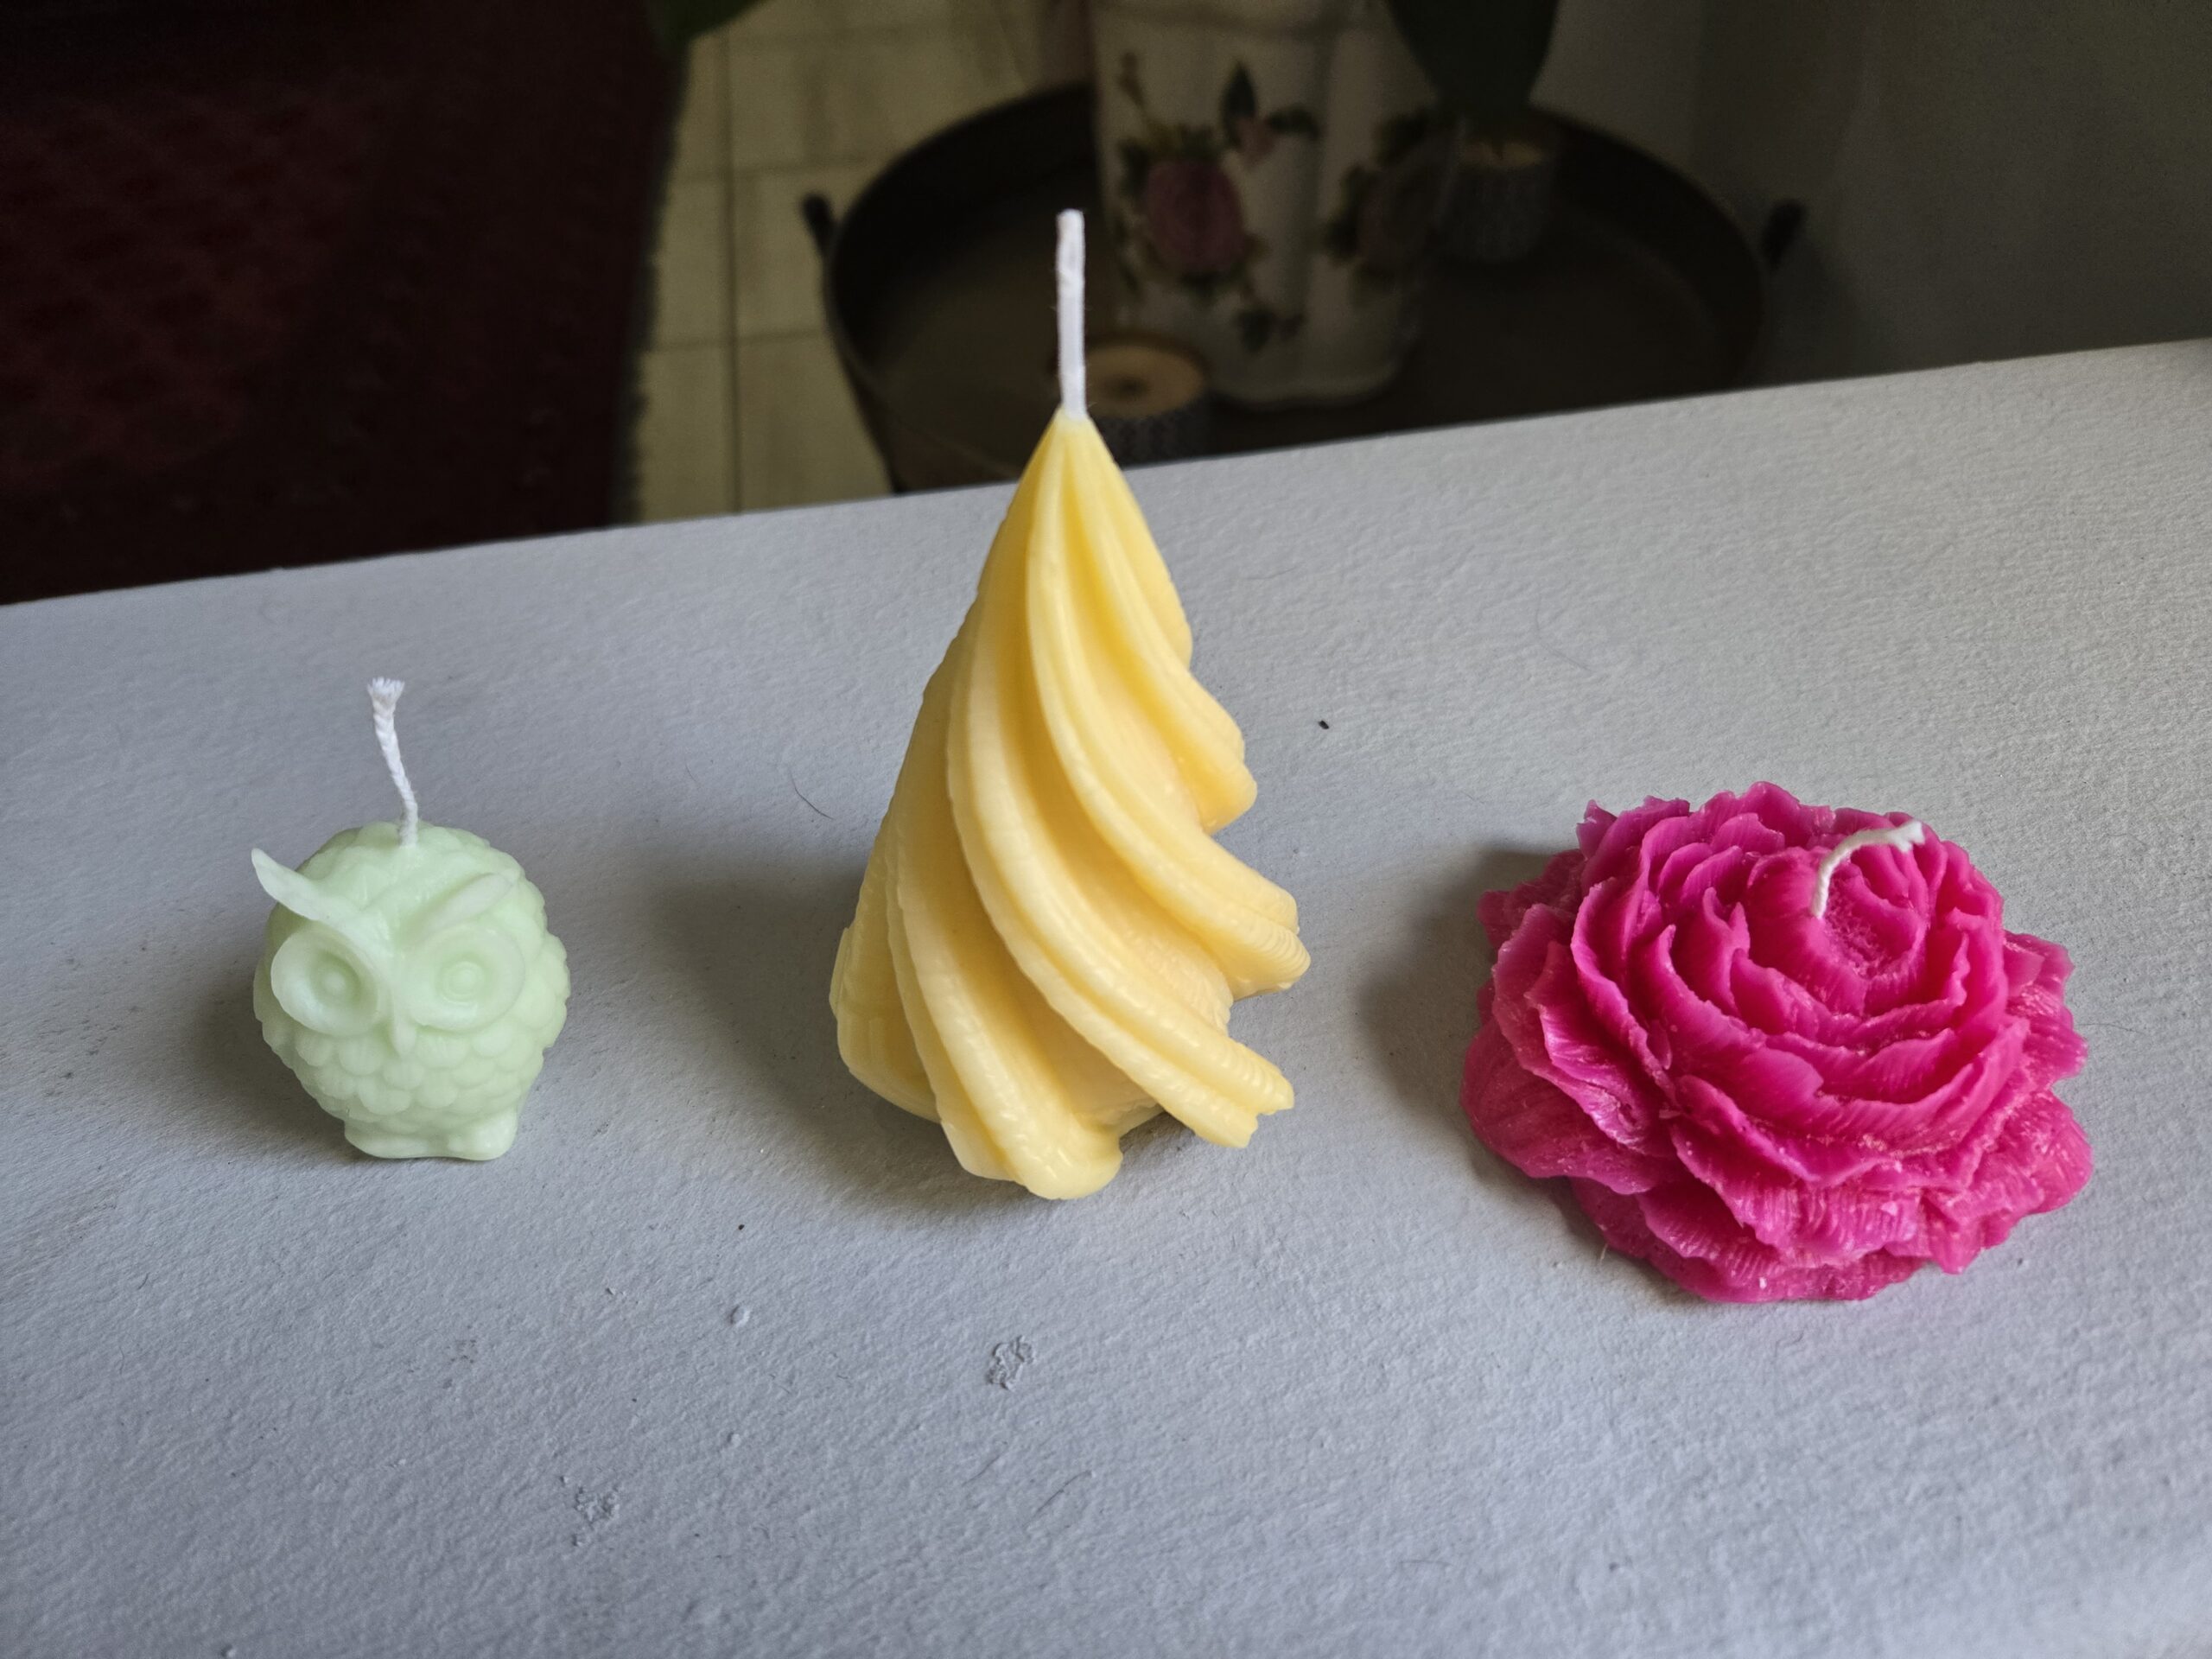
I’ve always been drawn to beautiful candles in stores, admiring their colors, scents, and designs. Recently, I decided to stop admiring from afar and try making them myself. So far, I’ve made candles on three separate occasions, and I’m completely hooked!
The process of transforming simple wax into something beautiful and fragrant has been incredibly satisfying. There’s something almost magical about watching the solid wax melt into a liquid and then solidify again in a new, beautiful form.
Essential Supplies for Beginner Candle Makers
Before diving into the creative process, here’s what I gathered to get started:
- Wax – I began with paraffin wax, which has been very rewarding to work with
- Silicone molds – I purchased 6 different designs
- Dyes – Both color blocks and liquid drops for experimenting
- Fragrances – Various scents to match different moods and seasons
- A stainless steel pot for melting the wax
- Kitchen scale for measuring ingredients
- Thermometer must have
While there are fancy equipment options out there, I opted for a budget-friendly approach to test the waters without a significant investment. You’d be surprised how much you can accomplish with basic kitchen supplies!
My Step-by-Step Candle Making Process
1. Preparation
First, I gather all my supplies and ensure my workspace is clean and protected. I usually lay down some newspaper or parchment paper to catch any spills.
2. Measuring the Wax
Using my kitchen scale, I weigh out about 150g of paraffin wax per small candle. The exact amount depends on the size of your mold, of course.
3. Melting the Wax
This is where the transformation begins! I place my wax in a steel pot and create a DIY double-boiler by putting this pot in a larger one with hot water. While professional candle makers might use dedicated wax melters, this method works perfectly for beginners and saves money.
Pro Tip: While the wax is melting, I warm my silicone molds in the microwave for about 30 seconds. I’ve found this makes a noticeable difference in how smoothly the candles release from the molds later.
4. Adding Color
This has been one of the most fun parts of experimentation! I’ve tried both dye blocks and color drops with interesting results:
- Dye blocks: A little goes a long way! I was surprised by how potent these are – just a tiny amount creates deep, vibrant colors. They’re sold by the gram and can be a bit pricey, but they’re economical since you use so little.
- Color drops: These create softer, more pastel shades regardless of how many drops you add. Perfect for subtle, delicate colors, but not ideal if you want bold, intense hues.
5. Adding Fragrance
All the fragrances I’ve tried have worked wonderfully! The key is finding the right amount – too little and you can barely smell it, too much and it can be overwhelming. I’m still experimenting with the perfect ratios, but that’s part of the fun.
6. Pouring and Setting
With everything mixed, I carefully pour the melted wax into my pre-warmed molds and let them rest overnight. Patience is key here – rushing the cooling process can affect the final result.
If you want our First Candle Making Recipe just click
7. Demolding
The next day comes the most exciting part – revealing my creations! It takes about 5 minutes to carefully remove the candles from their molds. I rinse the molds with water to remove any loose wax, and they’re ready for the next batch.
Time and Cost Considerations
From start to finish (excluding cooling time), the process of melting 150g of wax, adding colors and fragrances, pouring, and cleaning up takes me about 10-15 minutes. It’s quick enough to fit into even the busiest schedule!
While the initial investment in molds, wax, fragrances, and dyes might seem significant, consider how many candles you can make with these supplies. When you break it down per candle, it’s actually quite reasonable – especially compared to the price of premium store-bought candles.
Why I Love Candle Making (And Why You Might Too)
What I love most about this hobby is the perfect balance it strikes:
- It’s accessible – You don’t need special skills to get started
- It’s creative – The possibilities for colors, scents, and designs are endless
- It’s relaxing – The process is almost meditative
- It’s rewarding – You create something beautiful and functional
- It’s practical – Homemade candles make wonderful gifts or home decor
Tips for Fellow Beginners
- Start small – Don’t invest in expensive equipment until you’re sure you enjoy the hobby
- Keep notes – Record which combinations of wax, dye, and fragrance worked best
- Test your candles – Burn time and scent throw can vary based on your ingredients
- Experiment – Try different wax types (I’m planning to try soy wax next!)
- Be patient – Allow proper cooling time for the best results
- Safety first – Always keep an eye on melting wax and never leave it unattended
- Warm those molds – Pre-warming silicone molds really does make a difference
Next Steps in My Candle Making Journey
While I’m loving my results with paraffin, I’m excited to try soy wax next to compare the differences. I’ve heard soy candles burn cleaner and longer, so I’m curious to see how they perform. I’m also looking into more advanced techniques like layering colors and creating unique shapes. Follow me on Tiktok or Pinterest to follow the journey.
Final Thoughts: A Hobby Worth Trying
If you’ve been curious about candle making, I wholeheartedly encourage you to give it a try! It’s surprisingly simple to get started, tremendously satisfying, and creates beautiful items you can enjoy in your home or share as thoughtful gifts.
Have you tried candle making or are you thinking about starting? I’d love to hear about your experiences or answer any questions in the comments below!
Is candle making an expensive hobby to start?
Candle making can be as budget-friendly or as luxurious as you choose. To start, you’ll need basic supplies like wax, wicks, fragrances, dyes, and molds, which might cost $50-100 initially. However, this investment allows you to make numerous candles. While specialty equipment like wax melters can be pricey, beginners can use simple alternatives like a double-boiler method with kitchen items you likely already own. The cost per candle decreases significantly with each batch you make, making it more economical than purchasing high-quality store-bought candles in the long run.
What’s the difference between paraffin wax and soy wax for candles?
Paraffin wax and soy wax offer different benefits for candle makers. Paraffin wax is petroleum-based, typically less expensive, easier to work with for beginners, and excellent for holding vibrant colors and strong scents. It also has a higher melting point, making it stable in warmer environments. Soy wax is plant-based, renewable, burns cleaner with less soot, has a longer burn time, and provides a more subtle scent throw. Soy wax also tends to shrink less when cooling, which means fewer sinkholes in your finished candles. Each wax type has its advantages, and many crafters enjoy experimenting with both.
How do I prevent air bubbles in my homemade candles?
To prevent air bubbles in your homemade candles, try these techniques: warm your molds before pouring (as mentioned in my process), pour your wax at the correct temperature (usually between 125-145°F for paraffin), pour slowly and steadily from a lower height, gently tap the sides of your molds after pouring to release trapped air, and consider using a heat gun or hair dryer on low setting to pop surface bubbles before the wax sets. If you notice small bubbles forming as the wax cools, a second “topping off” pour can help create a smooth surface.
How much fragrance oil should I add to my candles?
The ideal amount of fragrance oil typically ranges between 6-10% of your wax weight for optimal scent throw. For beginners using paraffin wax, start with about 1 oz (about 30ml) of fragrance oil per pound of wax. This equals roughly 6% fragrance load and provides a good balance. Different waxes have different fragrance capacities – paraffin can generally hold more fragrance than soy. Start conservative and increase gradually in your next batches if you want a stronger scent. Remember that adding too much fragrance can cause the candle to burn improperly or even become a fire hazard.
Why did my homemade candles sink in the middle?
Candle sinkholes or depressions form primarily due to uneven cooling and wax shrinkage. To prevent this common issue: pre-warm your molds as I mentioned in my process, pour your wax at the appropriate temperature (following the wax manufacturer’s recommendations), and consider a “double-pour” technique – pour most of your candle, let it partially set until a thin skin forms on top, then poke a few relief holes near the center and top it off with additional melted wax. Temperature control is crucial – both the wax temperature and the room temperature where your candles cool can affect the final result.
How long should I let my homemade candles cure before burning them?
While technically you can light a candle once it’s completely solid, allowing your candles to cure improves their performance significantly. For paraffin candles, a minimum curing time of 24-48 hours is recommended. For soy candles, a longer curing period of 1-2 weeks allows the fragrance to bind properly with the wax. During curing, store your candles in a cool, dark place away from direct sunlight and strong odors. This patience pays off with better scent throw, more even burning, and a longer-lasting candle experience.
What are the best silicone molds for beginner candle makers?
The best silicone molds for beginner candle makers are those with simple shapes, smooth surfaces, and flexible yet sturdy construction. Look for food-grade silicone molds that can withstand temperatures up to at least 200°F. Simple geometric shapes, small containers, or basic cylindrical molds work well for beginners. Avoid intricate designs with fine details until you’ve mastered the basics. Multi-cavity molds are excellent for making several identical candles at once. Many candle makers (myself included) start with repurposed kitchen silicone molds or affordable craft molds from hobby stores before investing in specialized candle molds.
Can I use crayons to color my homemade candles?
While crayons might seem like an economical coloring option, they’re generally not recommended for candle making. Crayons contain pigments not designed for burning, which can clog wicks and create uneven burning patterns. They may also change color when heated and not mix well with candle wax. For best results, use specific candle dyes like the dye blocks or liquid drops I mentioned in my blog. These are formulated to blend properly with wax, maintain their color when heated, and burn safely. If you’re on a budget, start with just a few basic colors that you can mix to create various shades.
How do I fix candles that aren’t burning properly?
If your homemade candles aren’t burning properly, several adjustments can help. For tunneling issues (where only the center burns down), ensure you’re using the correct wick size for your candle’s diameter – a wick that’s too small is often the culprit. For sooty flames, trim your wick to ¼ inch before each burn and check if you’ve added too much fragrance oil. If your flame is too small, you may need a larger wick or different wick type. Keep detailed notes on your candle recipes, including wax type, container size, wick type, and fragrance load, so you can make systematic improvements with each batch.
What are the most popular candle scents for beginners to try?
Popular candle scents that work well for beginners include versatile fragrances with broad appeal: vanilla, which provides a warm, comforting scent that’s relatively easy to work with; lavender for a relaxing, spa-like atmosphere; clean cotton for a fresh, neutral fragrance; cinnamon or apple for seasonal warmth; and ocean or fresh linen for crisp, light scents. Single-note fragrances are easier to manage when starting out, but as you gain confidence, try creating unique blends like lavender-vanilla or citrus-herb combinations. Remember that fragrance oils specifically formulated for candle making perform better than essential oils, which often don’t provide as strong a scent throw when burned.