Shall we start Monday with cake? We totally should, especially when we talk Individual Raspberry Jam Cakes topped with fluffy vanilla whipped cream and purple sugar.
I made these cute cakes for teacher’s appreciation week, because I show love and gratitude thru cake. I was very happy when I got an email from my son’s preschool teachers that they loved the cakes. And what’s not to love? These Individual Raspberry Jam Cakes are truly amazing, light and fluffy, with a sweet raspberry jam filling, sandwiched between pink vanilla cakes.
These Individual Raspberry Jam Cakes are also very easy to make, you just need a half sheet cake pan, and some patience to cut and assemble the mini cakes. The whipped cream frosting is a breeze to whip, literally minutes, and pipping it is so much fun, because I always end up snacking on it.
The cake is delicious, not too sweet, made with ricotta, that gives it a nice, rich texture. I added some pink get food color to make it more fun. You can make even smaller cakes, I call mine individual since I have no problem eating one by myself, but these mini cakes can definitely feed two people.

Raspberry, vanilla and whipped cream, topped with fresh raspberries and purple sugar! This is all I want to eat!
If you make these Individual Raspberry Jam Cakes hopefully you will choose not to share yours!
This is what I used (affiliate links, you don’t pay extra, I just earn a small commission):
INDIVIDUAL RASPBERRY JAM CAKES

INGREDIENTS
- Cake:
- 3 ½ cups all-purpose flour
- 1 ½ teaspoons baking powder
- 1 teaspoon baking soda
- ½ teaspoon salt
- 2 cups ricotta cheese
- 2 cups granulated sugar
- 4 large eggs
- 8 full fat vanilla yogurt
- ½ cup vegetable oil
- 1 ½ teaspoons vanilla extract
- pink gel food color
- 6-8 ounces raspberry jam or preserves
- Frosting:
- 2 cups heavy whipping cream, cold
- 4 tablespoons sugar
- 2 vanilla beans, seeds only
- Garnish:
- 1 pint fresh raspberries
- purple sugar
INSTRUCTIONS
- Preheat oven to 350 F.
- Spray a half sheet pan ( 18″x13″x1″) with baking spray and line the bottom with parchment paper, spray the parchment paper and dust the pan with a little flour, tapping out the excess.
- In a large bowl, mix dry ingredients: flour, baking powder, baking soda and salt.
- In the bowl of a stand mixer fitted with the wire whisk, on medium speed beat the eggs, gradually add the sugar and beat until light and fluffy.
- Add ricotta cheese, oil and vanilla extract, mix until fully combined, pause to scrape the sides of the bowl with a spatula.
- Add the dry ingredients followed by the yogurt. Mix until blended, taking care not to over beat.
- Transfer batter to the baking sheet, spread evenly and bake for 30-40 minutes. A toothpick inserted in the middle of the cake must come out clean.
- Remove from the oven and let it cool in the pan for 15 minutes, after that, with the help of the parchment paper, slide the cake from the pan, to the counter to cool completely.
- Once completely cooled, trim the sides of the cake. Using a cake leveler, remove the brown top layer and level the cake to make it even.
- Using a stainless steel square form (or a knife and a ruler) cut the cake into mini cakes and set aside. Using a serrated knife, carefully remove the brown bottoms of the mini cakes. When cutting the mini cakes, make sure you have an even number of cakes.
- In the bowl of an electric mixer, beat heavy whipping cream, vanilla bean seeds and sugar until soft peaks form. Transfer to a pipping bag.
- Assemble:
- Spread 1 tablespoon of raspberry jam on top of a mini cake, top with whipped cream, another layer of cake, followed by raspberry jam and whipped cream. Garnish with fresh raspberries and purple sugar. Repeat with the remaining cakes.
- Refrigerate at least one hour before serving.
Note: For avoiding raspberry to stop sinking in cake, Put the fruit on top,Coat the fruit in flour,Split your batter,Cut the fruit up smaller.
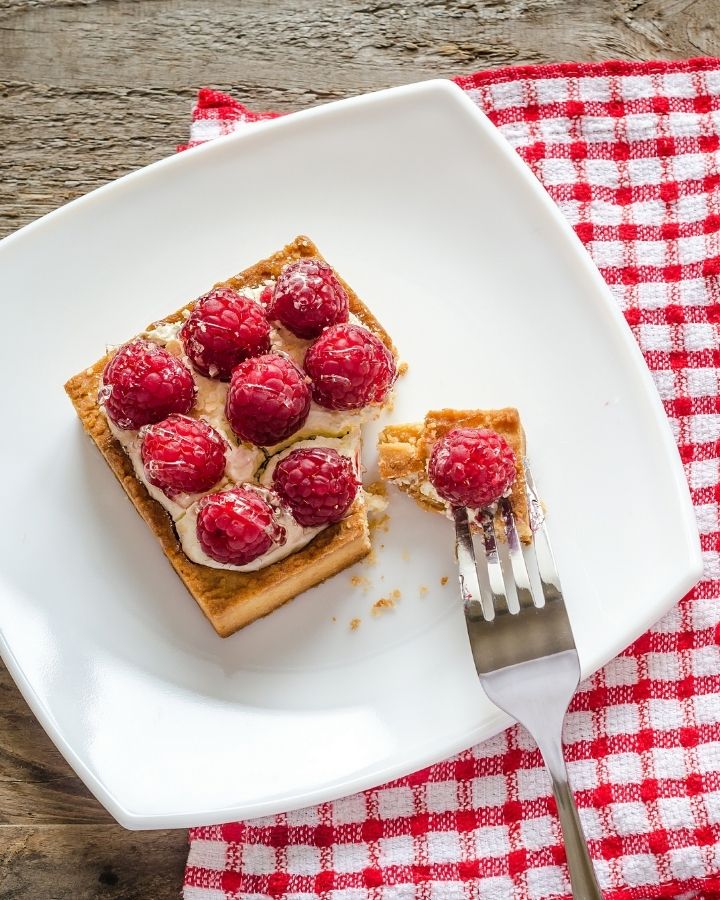
Why are these raspberry jam cakes so popular?
- To begin, the cakes are stunning, with a lovely pink colour and fresh raspberries.
- The cakes are also simple to create. To make the squares, bake a large one-layer cake and cut it into squares.
- Furthermore, the individual desserts are ideal for single servings, as well as being festive and portable.
- It’s ideal for a special event such as a baby shower, birthday, or Valentine’s Day.
- Because it can be constructed with a variety of colours, the mix variation is up to you.
- Finally, it’s a lot of fun to make with the kids.
This Raspberry Jam Cakes are easy to make and this is one of my favourites.Try out this recipe and let us know in the comments below.We love to hear from you☺️.

Ingredients
Method
- Preheat oven to 350 F.
- Spray a half sheet pan ( 18″x13″x1″) with baking spray and line the bottom with parchment paper, spray the parchment paper and dust the pan with a little flour, tapping out the excess.
- In a large bowl, mix dry ingredients: flour, baking powder, baking soda and salt.
- In the bowl of a stand mixer fitted with the wire whisk, on medium speed beat the eggs, gradually add the sugar and beat until light and fluffy.
- Add ricotta cheese, oil and vanilla extract, mix until fully combined, pause to scrape the sides of the bowl with a spatula.
- Add the dry ingredients followed by the yogurt. Mix until blended, taking care not to overbeat.
- Transfer batter to the baking sheet, spread evenly and bake for 30-40 minutes. A toothpick inserted in the middle of the cake must come out clean.
- Remove from the oven and let it cool in the pan for 15 minutes, after that, with the help of the parchment paper, slide the cake from the pan, to the counter to cool completely.
- Once completely cooled, trim the sides of the cake. Using a cake leveler, remove the brown top layer and level the cake to make it even.
- Using a stainless steel square form (or a knife and a ruler) cut the cake into mini cakes and set aside. Using a serrated knife, carefully remove the brown bottoms of the mini cakes. When cutting the mini cakes, make sure you have an even number of cakes.
- In the bowl of an electric mixer, beat heavy whipping cream, vanilla bean seeds and sugar until soft peaks form. Transfer to a pipping bag.
- Assemble:
- Spread 1 tablespoon of raspberry jam on top of a mini cake, top with whipped cream, another layer of cake, followed by raspberry jam and whipped cream. Garnish with fresh raspberries and purple sugar. Repeat with the remaining cakes.
- Refrigerate at least one hour before serving.
Frequently Asked Questions
Can raspberry jam be used as a cake filling?
Yes.Spread 1 tablespoon of raspberry jam on top of a mini cake, top with whipped cream, another layer of cake, followed by raspberry jam and whipped cream. Garnish with fresh raspberries and purple sugar.
How do you keep raspberries from sinking in a cake?
Put the fruit on top,Coat the fruit in flour,Split your batter,Cut the fruit up smaller.
Can you use jam to fill a cake?
Yes.Spread 1 tablespoon of raspberry jam on top of a mini cake, top with whipped cream, another layer of cake, followed by raspberry jam and whipped cream. Garnish with fresh raspberries and purple sugar.
How much jam do I add to cake mix?
6-8 ounces raspberry jam or fruit preserves.
